
How to Setup Google Indexing API (Step-by-Step)
The “Request Indexing” button in Search Console is a suggestion, not a command.
If your posts are sitting on “Discovered – currently not indexed” for weeks, you are hitting a bottleneck. I stopped relying on that button and switched to the Google Indexing API.
Instead of waiting days for a crawl, I’ve seen my pages crawled and indexed in hours—sometimes minutes. This is the exact, step-by-step setup I use to bypass the queue and force Google to see my content. It works even on brand-new domains where the standard method often fails.
Why Indexing API Works Better Than “Request Indexing”
Let’s keep this simple.
-
Search Console button
- You’re requesting Google to crawl
-
Indexing API
- You’re directly notifying Google
That’s the difference.
The button is a suggestion. The API is a signal.
Manual requests are throttled per user; API requests are credited to the project.
What this really means is:
- Faster crawl
- Faster indexing (if it follows Google’s guidelines)
- Better control over your URLs
And most importantly, it helps break that “Discovered but not indexed” loop which kills new sites.
It can only increase chances of Crawling but never guarantees Indexing.
What You Need Before Starting
Don’t jump into steps yet. First, make sure you have:
- A website (WordPress is easiest)
- Access to Google Search Console
- A Google account (for Google Cloud)
That’s it.
Phase 1: Create Google Cloud Project & Enable API
This is where the setup starts.
- Go to Google Cloud Console
- Click Create Project
- Give it any name (doesn’t matter)
- Open the project
Now:
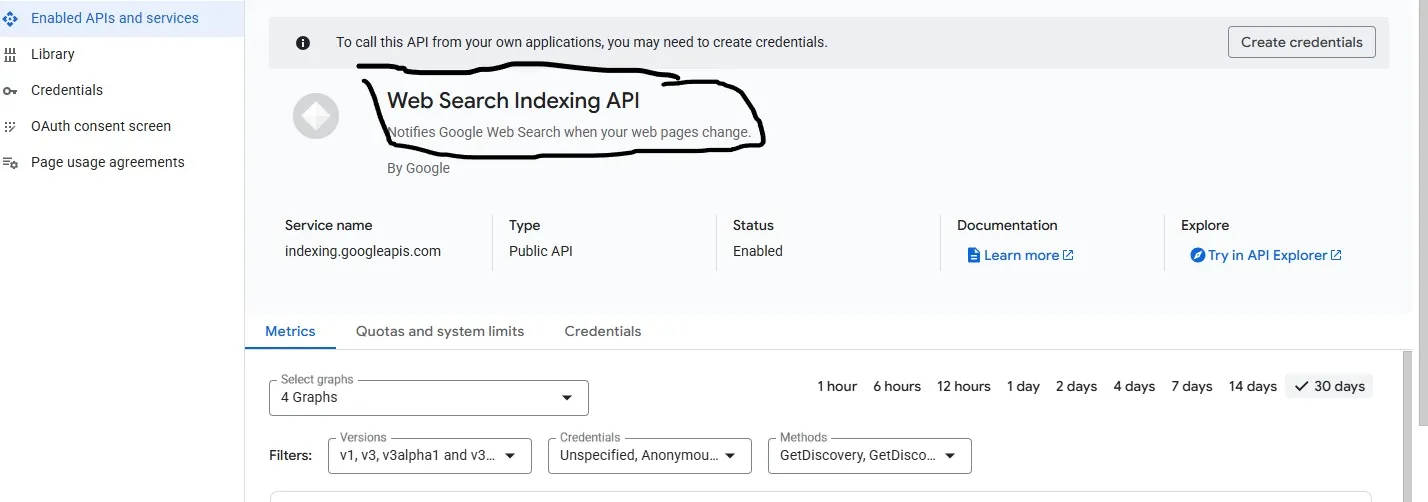
- Go to APIs & Services → Library
- Search for Indexing API
- Click it and hit ‘Enable’
That’s your backend ready.
Phase 2: Create Service Account (Most Important Part)
Now we create the identity that will send requests to Google.
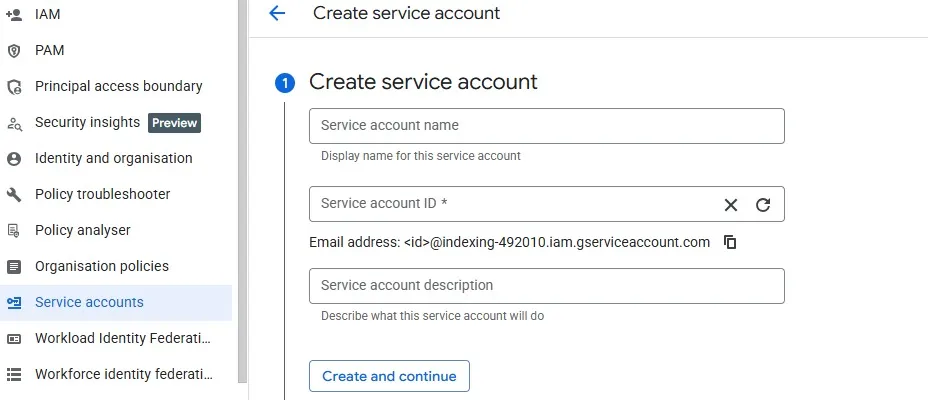
- Go to APIs & Services → Credentials
- Click Create Credentials → Service Account
- Give it a name (anything simple)
- Click Create and Continue
Now:
- Open your service account
- Go to Keys tab
- Click Add Key → Create new key
- Choose JSON
- Download it
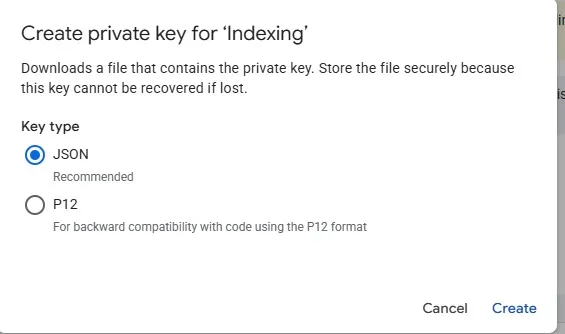
This JSON file is important.
Think of it like a password. Don’t lose it.
Phase 3: Connect to Search Console (This is Where Most People Fail)
This is the step almost everyone messes up.
Open your JSON file and find this:
client_email
Copy that email.
Now go to your Google Search Console:
- Open your property
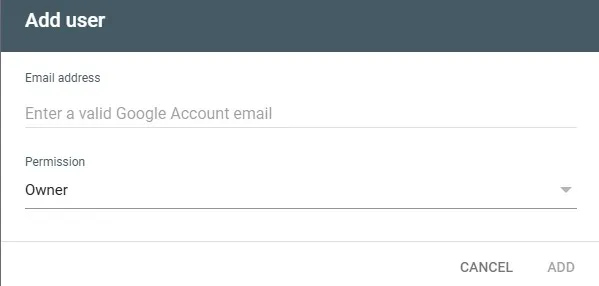
- Go to Settings → Users and Permissions
- Click Add User
- Paste that email
Now here’s the key point:
Give it OWNER access. Not Full User.
If you don’t do this, you’ll get a 403 error later.
Phase 4: Connect Everything to WordPress

Now we connect it to your site.
The easiest way is using a plugin:
- Install Rank Math (if not already)
- Install plugin: Instant Indexing by Rank Math
After installing:
- Go to Rank Math → Instant Indexing → Settings
- Upload your JSON file
- Save changes
Now select:
- Posts
- Pages
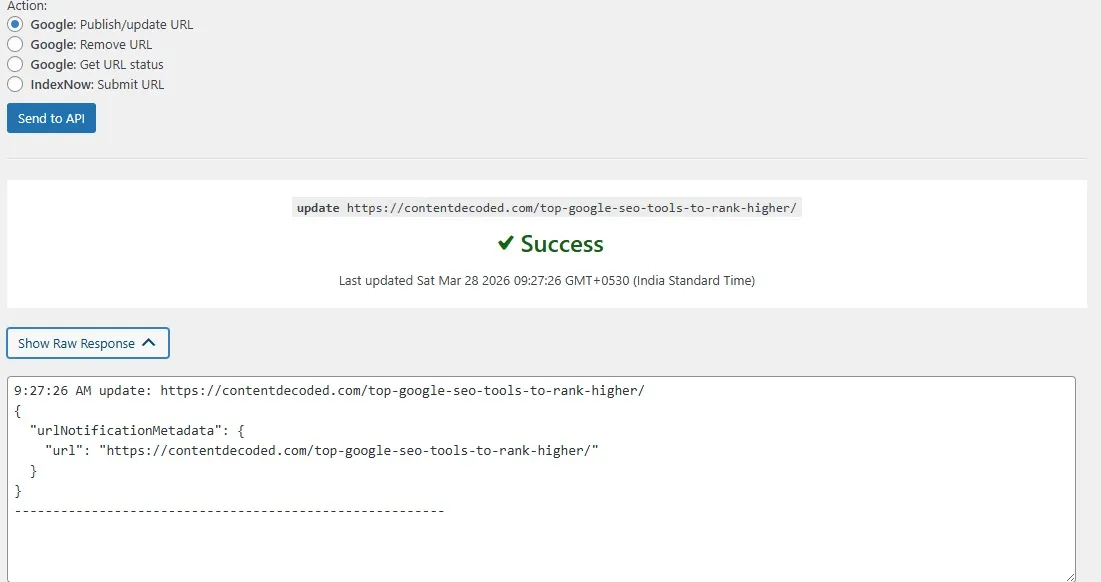
- Paste your URL
- Click Send to API
- Google crawls faster
- URL gets into index quickly
- You avoid indexing delays
- Pages stuck for days
- Discovered but not indexed” everywhere
- Pages started getting picked up within hours
- Crawl frequency improved
- Indexing became consistent
- Create a new URL (same content or slightly improved)
- 301 redirect the old URL to the new one
- Slow indexing
- New site crawl issues
- Discovered but not indexed problem
- Bulk URL submission
- API enabled in Google Cloud
- Service account created
- JSON key downloaded
- Service email added as OWNER in Search Console
- JSON uploaded in plugin
- The test request shows 200 OK
This means every time you publish or update, it will send a request automatically.
How to Send Your First Indexing Request
Now test it.
Go to:
Rank Math → Instant Indexing → Console
If everything is correct, you’ll see:
Status: 200 OK
That means success.
You’ve done it.
If you see 429 Too Many Requests, it simply means you’ve hit your daily limit (usually 200 URLs). Nothing is broken. Just wait for the next day or slow down your requests.
What Happens After You Send Request
Don’t expect ranking. That’s not the goal.
What happens is:
In my experience, this alone solves a big chunk of indexing issues on new sites.
Why This Method Works (My Experience)
I’ve personally used this on a new domain.
Before API:
After API:
So yeah, this isn’t theory. This works.
Sometimes, even after using the API, a few URLs still refuse to move. It’s rare, but it happens.
In that case, the last method I use is:
This “URL swap” forces Google to treat it fresh, and in many cases, it finally gets indexed.
Don’t use this for every page. Only for those stubborn URLs that don’t respond even after the API.
Common Mistakes (Avoid These)
1. Not giving OWNER access
Result: 403 error
2. Wrong JSON file
Result: API won’t connect
3. Expecting ranking boost
This is for indexing, not ranking
Daily Limit (Important)
Default quota: 200 URLs per day
For most people, that’s more than enough.
If needed, you can request an increase later.
What This Fixes
This setup helps with:
Final Checklist
Before you leave, confirm this:
If all done, your setup is complete.
FAQ
Is this safe to use?
Yes. You’re using Google’s own system.
Does it guarantee indexing?
No. But it significantly increases your chances and speed.
Does it improve ranking?
No direct impact. But faster indexing = faster visibility.
Can I use it on new sites?
You should. It helps especially on fresh domains.
Don’t sit and wait for Google anymore.
Once this is set up, every time you publish, you’re telling Google instantly.
And if you’re still struggling with stuck pages even after this, I’ll show you another method I’ve used to push those URLs that even API couldn’t move.That’s where things get really interesting.
— trust grows in systems, not silos —